Bulk Editing
The bulk editor interface allows you to make edits to multiple tasks, issues, or projects (up to 500 records at one time). It's easy to apply changes to all records in the editor, as well as a selected subset of records; you can also clear the values in a column (provided the field is editable and not required). You can incrementally save your edits while remaining in the editor as you configure additional changes. The bulk editor allows you to edit fields that you might not be displaying on the grid, and provides a quick spreadsheet-like interface for editing all fields.
You can configure the bulk editor to display fields from the superset of fields that are available to be configured on an entity's Grid Columns. The fields will be available in the Column Settings dialog, where you can choose which fields to display in the editor. See Field Eligibility below.
Note that entity alerts (such as project owner alerts) are triggered by changes made from the UI/bulk editing and via data import (for update).
Field Eligibility
The following fields will not appear in the bulk editor:
-
From the task entity - Predecessor, Successor, Scheduled Resources fields, as well as Start Dates and Target Dates on tasks that have no children
-
Calculated fields
-
Read-only fields
Invoke the Bulk Editor
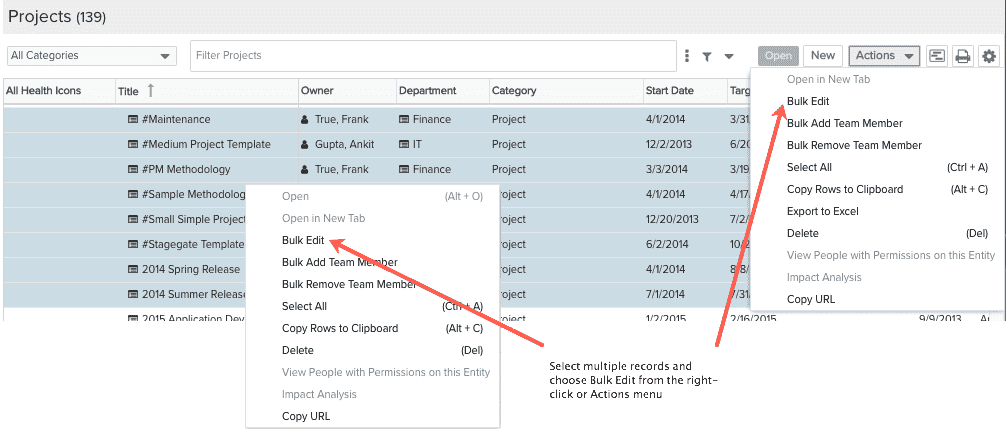
You invoke the editor by selecting a group of fields (use Shift-click to select a range, or Ctrl-click to select non-adjacent rows) and choosing Actions > Bulk Edit, or Bulk Edit from the right-click context menu.
Configuring the Editor
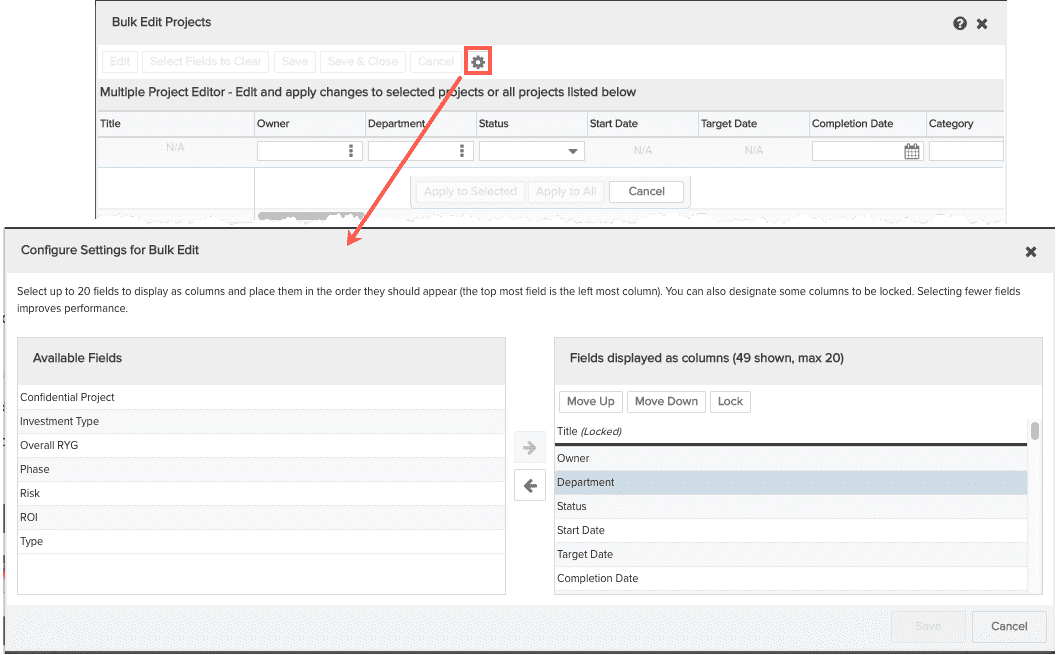
By default, the editor displays the same columns you have displayed in the entity grid (project/task/issue), including any custom fields your organization has created. Click the gear icon to display the Configure Setting dialog, where you can do the following:
-
To add/remove fields, click the gear icon and select/deselect the column(s) you want to appear.
-
To rearrange the columns, select the field and click Move Up or Move Down.
-
To lock columns (place in the non-scrolling region), select the field and click Lock.
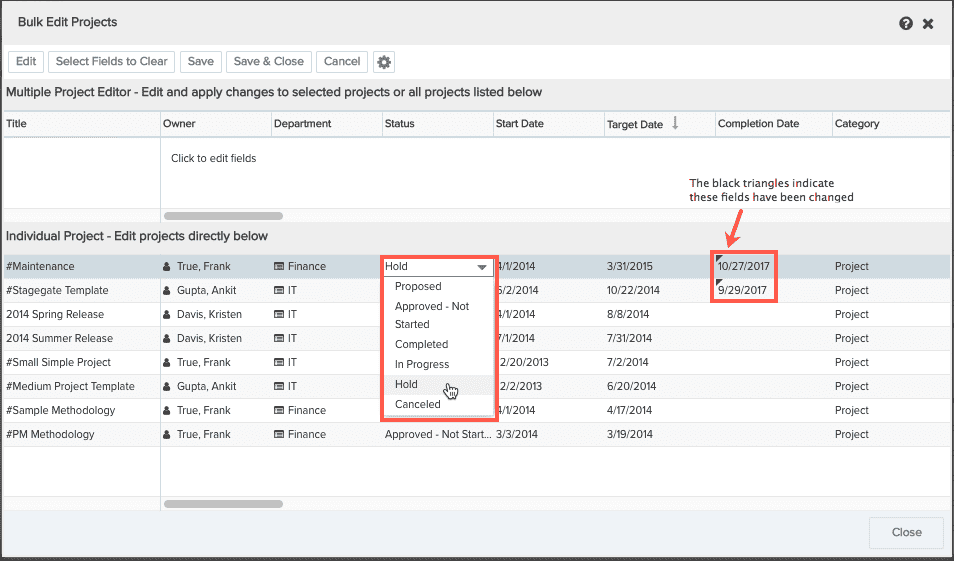
Anatomy of the Editor
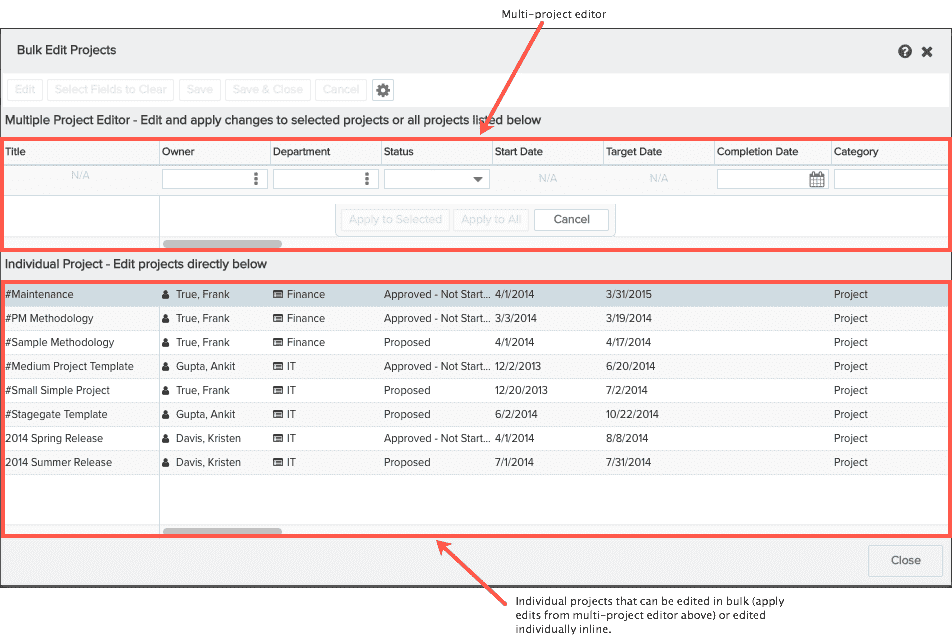
The editor has two main areas: the multiple projects editor at the top, and a spreadsheet-style list of projects at the below that can be edited individually.
When you open the editor, the editor is "open" and looks much like the row editor you've seen on entity grids like the Issues or Tasks lists.
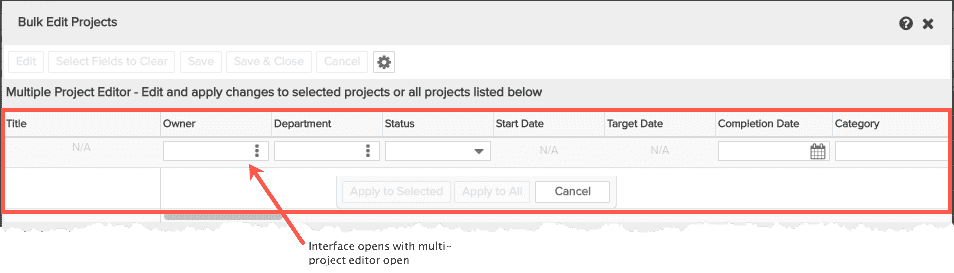
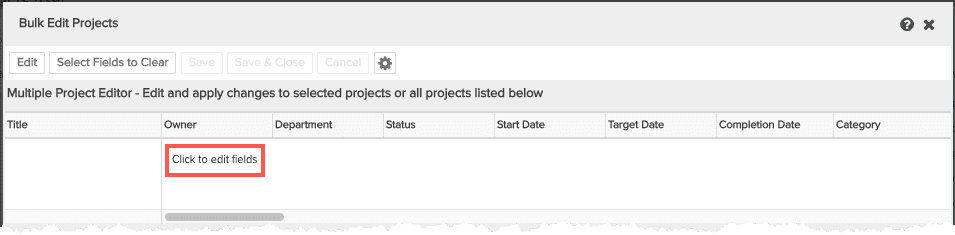
After you apply an edit, the editor closes but the interface remains open. To re-open the editor to make additional edits, click the Edit button, or click "Click this text to edit".
To save edits and leave the editor open, click the Save button. To save edits and close the editor, click the Save & Close button.
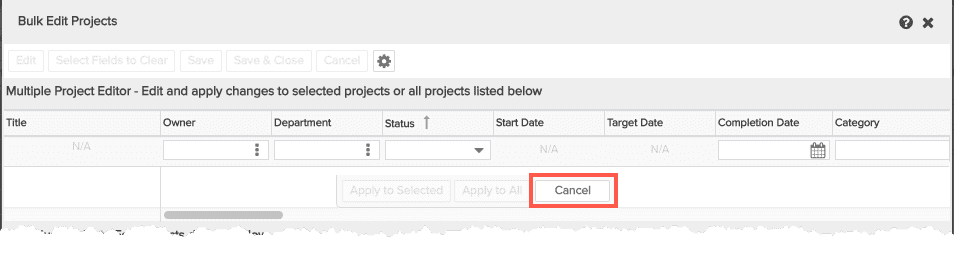
Cancel edits by clicking the Cancel button prior to saving. The editor will remain open.
To bulk edit an entity
Note: To bulk edit boolean (checkbox) fields, you need to use the Clear function. For example, you cannot clear checked boxed by unchecking a checkbox and applying to selected records; you must explicitly clear. See Clearing Fields.
- From an entity grid (project, issue, task), select multiple records and choose Actions > Bulk Edit.
- Configure the value(s) you want to update.
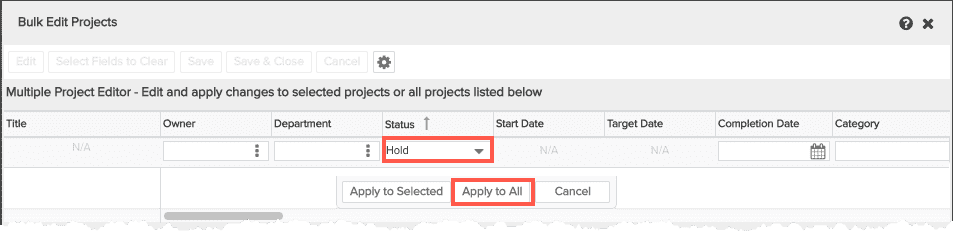
- Click the Apply to All button to apply the change to all records in the list. Or, select specific records in the list and click the Apply to Selected button.

- Click Save and keep the option to make additional edits, or click Save & Close to close the editor. If you want to make additional edits, you can click the Edit button to open the editor, or click "Click to add text".
Always remember to Save before closing the editor (or click Save & Close). You will receive a confirmation prompt if you close the editor with unsaved changes.
Clearing Fields
You can clear columns for selected or all records on the grid. Assuming you are already in the bulk editor, do the following:
- Invoke the editor.
Note: When you first invoke the editor, the multi-line row editor (at the top of the modal) is open by default. To use the Select Fields to Clear button, you need to first click Cancel to cancel out of the editor, as shown below.
- Click the Select Fields to Clear button to invoke the Clear Values from Fields dialog. This dialog displays the list of fields that are eligible to be cleared - fields that are editable and not required. If the Select Fields to Clear button is not active, click the Cancel button in the multiple item editor.
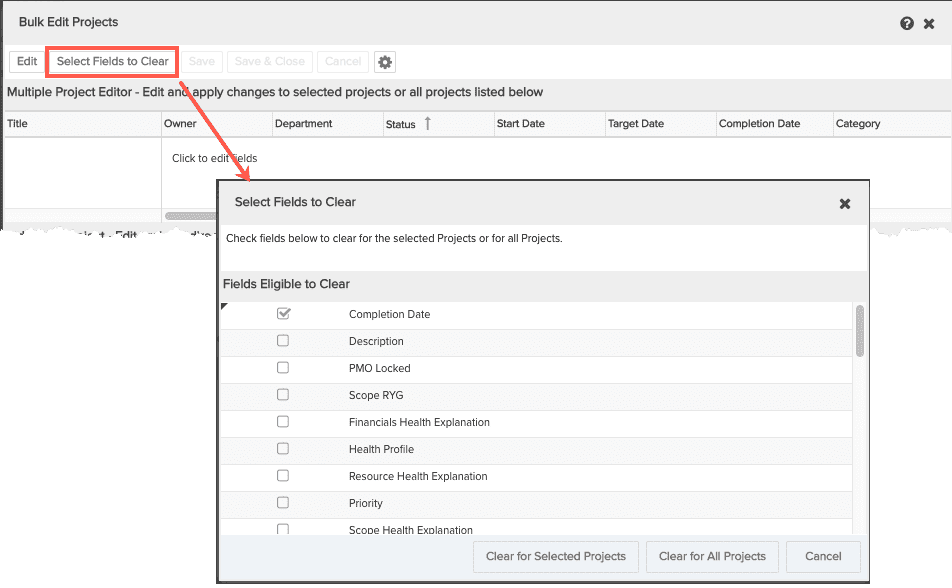
- Check the box next to each field you wish to clear.
- If you want to clear the columns for the selected rows only, click Clear for Selected Project. If you want to clear the columns for all the rows in the editor, click Clear for All Projects.
- Click Save & Close when you are done.
Individual Edits - Spreadsheet Style
Note: IE users who wish to paste from their clipboard into a long text field within the bulk editor, ensure that your browser is configured to enable programmatic clipboard access. This is only applies for the inline edit for individual rows. The top shared row will always work, as will using the '...' button to open the larger rich text editor window. You can enable programmatic clipboard access in the Scripting section of your IE Security Settings. If you are having a problem pasting into a long text field, please check this setting (or use the top section of the editor or the '...'button in the inline editor).
You can also made edits one at a time in the lower pane of the editor. You can edit individual cells, similar to the way you would edit a spreadsheet; use Tab to navigate between cells. When you are finished making your edits, click Save or Save & Close.